There's just something about a green smoothie that makes me happy. And this one in particular, since it's creamy, green AND delicious. Bananas are the key ingredient to this smoothie, and more specifically: a frozen banana. Aka the key to creaminess.
Recently I've been helping my parents refinish their deck. While I enjoy the challenge, I also need the right fuel for lots of time in the sun with my handy dandy belt sander. This smoothie is great fuel for just that!
Creamy Green Smoothie (serves 1 - 2)
2 bananas
1 frozen banana
1 - 2 stalks of pineapple
3 - 4 dates
2 cups of cold water (or coconut water)
2 big leaves of kale
Put all ingredients into blender (loading the soft ingredients towards the bottom) and blend away! Serve in a mason jar with a straw and enjoy :)
Showing posts with label coconut. Show all posts
Saturday, 24 May 2014
Thursday, 20 February 2014
DIY Coconut Butter
While I was in the midst of making my almond butter recipe I decided it was also the right time to try blending something else for a prolonged period of time: coconut.
We do have a bottle of coconut oil and usually always have a bag of unsweetened shredded coconut, but we never have any coconut butter on hand. I've never actually looked for a bottle of it myself, but I can imagine it wouldn't be the easiest thing to find - or cheapest.
I took probably about 2 cups of unsweetened shredded coconut and popped it in the food processor with an S-shaped blade. I kept on blending and blending, smooshing and smooshing and voila. Coconut butter... or what looked like a thick coconut milk, was born.
I poured it into a mason jar and let it set in the fridge. Since it's winter here, I could probably leave it out of the fridge the soften slightly, but overall it does look very similar to coconut oil. Just more opaque.
Saturday, 8 February 2014
Almond Coconut Granola
Last month I made a nutty chocolate granola that I baked at a temperature that was.... too toasty. It ended up a little crisp but I finished it off. This time, I wanted to make something with the leftover almond pulp I had from making almond milk last weekend.
Almond Coconut Granola (serves many :)
2 cups almond pulp
1 cup shredded unsweetened coconut
4 tbsp honey
3 tbsp maple syrup
1/3 cup walnuts
1/3 cup slivered almonds
2 tbsp cocoa powder
2 tsp cinnamon
I found a recipe and made a few substitutions and came up with this brilliant and golden GRANOLA!
Almond Coconut Granola (serves many :)
2 cups almond pulp
1 cup shredded unsweetened coconut
4 tbsp honey
3 tbsp maple syrup
1/3 cup walnuts
1/3 cup slivered almonds
2 tbsp cocoa powder
2 tsp cinnamon
Combine all dry ingredients in a bowl, mix thoroughly and then combine with the wet. Mix until well combined and then lay on a baking sheet lined with parchment paper and bake at 300F for 20 - 25 minutes - until golden!
**If your almond pulp isn't exactly dry, throw it on the baking sheet first and bake for about 10 minutes until slightly toasted and drier.
Serve by itself as a snack, or with almond milk and fruit for breakfast :)
Labels:
almond pulp,
breakfast,
cinnamon,
cocoa,
coconut,
Gluten free,
granola,
honey,
maple syrup,
raspberry,
roasted,
vegan
Saturday, 11 January 2014
Simple Mango Smoothie
All week I've had this craving for mango. Luckily we were able to buy some frozen in bulk. Naturally the first thing I do is throw it in a smoothie. A delicious smoothie.
I honestly just would have thawed it and eaten it as is, but I thought blending it with another simple ingredient would be just as good. That ingredient is..... coconut milk! If you want a tropical feel to your smoothies I suggest adding coconut milk. And who doesn't want that in the middle of a cold, snowy winter?
Yes I had this whole thing to myself (boy was it good) but it was a whole meal for me :)
Simple Mango Smoothie (serves ~ 1 - 3)
4 cups of frozen mango chunks
1 cup light coconut milk
2 cups cold water (add more if it isn't blending smoothly)
Blend with a high speed blender, making sure everything is fully combined and serve immediately!
Monday, 2 September 2013
Classic Green Smoothie
In the past I have tried several green smoothie recipes (most of which were developed in my head) and none of them really blew me away. I was always trying to just add greens into a smoothie I already knew I'd enjoy, and something about that just wasn't right.
Last night I YouTubed "Best Green Smoothie" and learned quite a bit. Of course there are greens, but the fruit you choose is quite important. A very ripe banana or pineapple will add enough sweetness to counteract the bitterness of the greens - making it more palatable!
I decided it was time to finally master a green smoothie.
1 cup spinach
Last night I YouTubed "Best Green Smoothie" and learned quite a bit. Of course there are greens, but the fruit you choose is quite important. A very ripe banana or pineapple will add enough sweetness to counteract the bitterness of the greens - making it more palatable!
I decided it was time to finally master a green smoothie.
And it turned out GREAT! Way better than I had expected. It tastes sweet, with a hint of greens, and the aftertaste is not bitter because of the banana. I have a feeling this has changed the way I will think about smoothies. YUM.
Classic Green Smoothie (serves ~ 1-2)
1 cup spinach
1 cup kale
1 ripe banana
1.5 cups chopped pineapple
2 tbsp. unsweetened coconut
2 cups water (feel free to use coconut water instead)
1/2 - 1 cup of ice
Blend away until completely smooth and serve in a mason jar :) Enjoy!
Monday, 13 May 2013
Monday Breakfast
It's Monday morning, but it feels like Saturday to me. Since I'm working part-time and going to school this summer, my 'weekends' move around quite frequently. Today I have the day off and when it came to breakfast, I realized I hadn't had pancakes in a long time. Too long.
My Mum recently went on a gluten free flour buying extravaganza which left me with several options for this mornings creation. I originally thought I picked up the brown rice flour bag, only to realize later it was actually buckwheat flour. Whoops. Don't worry though... they turned out great!!
Buckwheat Protein Pancakes (serves 1)
1/2 banana mashed
1/8 - 1/4 cup egg whites
1 tsp ground flaxseed
1 T buckwheat flour
1 T protein powder
1 tsp cinnamon (optional)
Mash the banana in a bowl and then add all other ingredients. Mix well. Cook over medium heat on a lightly greased pan (I used coconut oil). Flip approximately every 3 - 4 minutes. Serve warm and enjoy!
Labels:
breakfast,
coconut,
Food,
Gluten free,
happy,
Nutrition,
pancakes,
peanut butter,
Recipe
Tuesday, 7 May 2013
Chocolate Peanut Butter Ice Cream Cake
I'm a sucker for all things peanut and chocolate. Isn't everybody? As soon as I laid eyes on this recipe for a deep dish chocolate peanut butter ice cream cake, I knew the day would come where I would recreate this amazing dessert.
I didn't have the amount of dates required for the recipe... but not to worry! Dates have many substitutions, such as prunes and figs (which we had!). I made the necessary modifications and upped the peanuty-ness just for fun.
Chocolate Peanut Butter Ice Cream Cake (inspired by This Rawsome Vegan Life)
Crust
1/2 cup dates
1/4 cup dried figs
1/4 cup prunes
1/3 cup ground flaxseed
1/2 cup hulled hemp hearts
3 tbsp cocoa powder
Filling
3 frozen bananas
1/2 cup dates
1/4 cup dried figs
1/4 cup prunes
1 cup cashews
1 cup peanuts
2 tbsp coconut oil (melted)
1/4 cup cocoa powder
2 tbsp peanut butter
1 cup unsweetened almond milk
For the crust, pulse the flaxseed, hemp and cocoa powder in a food processor. Add the dried fruit and blend until the mixture begins to stick. Press onto the bottom and sides of a spring-form pan. Mine is 8" in diameter, but a smaller one would work as well.
For the filling, I put EVERYTHING into the food processor, but you may want to start with the nuts and alternate adding dry and wet ingredients whilst blending. Make sure to scrape down the edges of the food processor periodically to ensure proper mixing. After everything is blended, pour into the spring-form pan and smooth out. Leave in the freezer overnight, or for the whole day.
Take out for approximately 10 - 20 minutes before serving for a creamier texture :)
Wednesday, 1 May 2013
Vegan Pumpkin Oat Bars
I went on a pumpkin craze. There... I said it. Good things did happen though. I had a baking filled day to say the least.
The first thing I will share are these pumpkin oat bars. I have recently been on the lookout for more bar type of recipes. I think making your own food (including things you could easily buy at the store) is such a great idea. You not only know what is going into your body, but you can manipulate any or all of the ingredients!

Vegan Pumpkin Oat Bars (inspired by Tasty Yummies)
2 cups oats
1/2 cup almond flour
1 tsp cinnamon
1/2 tsp nutmeg
1/8 tsp cloves
1/4 tsp salt
1 tbsp ground flaxseed
1 cup canned pumpkin
1 tsp vanilla
1/4 cup maple syrup
1 tsp stevia (or 5 drops of liquid stevia)
1/4 cup shredded coconut (unsweetened)
1/2 cup craisins
1/4 cup slivered almonds
Preheat the oven to 350F and line a 8" x 8" baking pan with parchment paper (or grease well). Mix ALL ingredients in one bowl making sure everything is evenly coated. Press into the baking pan (sprinkling with any desired extra toppings) and bake for 20 - 25 minutes (I baked mine for 23 minutes).

The first thing I will share are these pumpkin oat bars. I have recently been on the lookout for more bar type of recipes. I think making your own food (including things you could easily buy at the store) is such a great idea. You not only know what is going into your body, but you can manipulate any or all of the ingredients!
Vegan Pumpkin Oat Bars (inspired by Tasty Yummies)
2 cups oats
1/2 cup almond flour
1 tsp cinnamon
1/2 tsp nutmeg
1/8 tsp cloves
1/4 tsp salt
1 tbsp ground flaxseed
1 cup canned pumpkin
1 tsp vanilla
1/4 cup maple syrup
1 tsp stevia (or 5 drops of liquid stevia)
1/4 cup shredded coconut (unsweetened)
1/2 cup craisins
1/4 cup slivered almonds
Preheat the oven to 350F and line a 8" x 8" baking pan with parchment paper (or grease well). Mix ALL ingredients in one bowl making sure everything is evenly coated. Press into the baking pan (sprinkling with any desired extra toppings) and bake for 20 - 25 minutes (I baked mine for 23 minutes).
Friday, 26 April 2013
10k and Gluten Free Pancakes
After seeing Lean Secrets Flat Belly Pancakes (gluten free pancakes), I wanted to try a variation myself! We recently acquired some coconut, almond and chickpea flour in our house and I couldn't think of a better way to try them out!
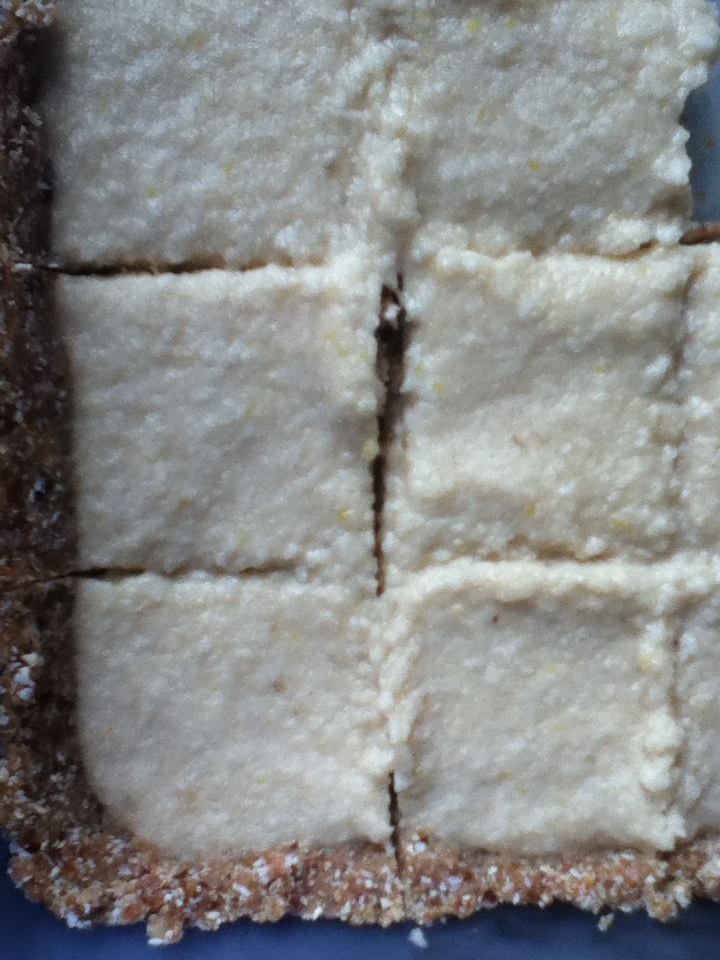
They turned out great: nice and fluffy, however, they did stick to the pan a bit more than I expected which could be because of the ground flaxseed. The recipe is below :)
Rosie's Gluten Free Pancakes (serves ~ 1 - 2)
1 tbsp coconut flour
1 tbsp almond flour/meal
1 tbsp ground flaxseed
2 tbsp unsweetened almond milk
1/2 banana mashed
1/4 - 1/3 cup egg whites
Dash of cinnamon and stevia
Combine all ingredients in a bowl and mix well. Cook on a lightly greased pan over medium heat for approximately 3 minutes each side. I made 3 smaller pancakes, but you could make 2 or even 1!
Toppings (anything your heart desires)
1/2 cup raspberries
1/4 cup greek yogurt
1/2 banana sliced
Carob chips
Mix and mash 1/2 of the berries with the greek yogurt to make jam-like topping :)
Changing the subject from delicious food... I ran my first 10k race this past weekend! I signed up at the end of November 2012, making sure I had plenty of time to train for April (almost 5 months to prepare). I also wanted to make sure I had time to accommodate any set-backs (getting sick, missed runs, school.. etc.) which was a GREAT idea. I did miss a couple of weeks here and there but still managed to get all of my training done in time. I followed through and made up missed days.
I followed this Hal Higdon 10k Training Program which was perfect for me. I ended up doubling every week in order to build endurance slowly and effectively. I could run 5k when I first started the program so of course I knew I would have to push myself progressively, but it was just enough.
I ran mostly on the treadmill since I was training through a cold Canadian winter, but during the last few weeks of the program I managed to get outside and surprised myself! I always thought running outside was physically more difficult, but I learned to PACE myself and 10k became a breeze. I couldn't believe it! I didn't care if it took me over an hour to complete... I DID it. I ran the distance and that was my top priority :)
Race day came around and I was nervous but more so excited. It wasn't a question of if I could (like my first race), it was more a question of how I would. I showed up about 45 minutes early to get my chip. I then tried to stay warm until I started!
The actual race itself was great. We ran along a very picturesque river and once we hit the 5k marker, we turned around and ran right back. My pace was a touch faster than I was used to, but running with that many people made the time go by faster. I pushed it during the last 2 - 3 km and ended up finishing 1:07! A record for me!!
I highly suggest signing up for a race, either by yourself or with friends, and really enjoy the training process. It's so rewarding knowing what your mind and body can accomplish together if you work hard.
Wednesday, 24 April 2013
Chocolate Peanut Butter Bliss
And you thought peanut butter got any more blissful? Me neither. Until this recipe.
I was honestly looking for a recipe to use up the rest of our 'Smooth Kraft Peanut Butter' since we've decided to buy all-natural now. I originally thought cupcakes, then muffins, then cookies... and then came across these Chocolate Peanut Butter Love Bites.
I was looking for something gluten-free and vegan! And of course... I made a couple of modifications :)
Chocolate Peanut Butter Love Bites
Center
1/4 cup oats
1/2 cup peanut butter
1/3 cup peanuts
1-2 tbsp maple syrup
Chocolate Coating
3 tbsp almond butter
2 tbsp maple syrup
2 tbsp cocoa powder (heaping, I might add)
1/8 tsp salt
2-3 tbsp almond milk (unsweetened)
Coating
1/4 cup peanuts
1/4 cup unsweetened shredded coconut
1/2 tsp salt (optional)
Pulse the coating ingredients in your food processor until it becomes granular and crumb-like. Place in a bowl and put aside.
Pulse the center ingredients in your food processor until a large ball forms. Shape into small balls (approximately 12 and I put mine on a plate) and place in the fridge.
Pulse the chocolate coating ingredients in your food processor until a thick sauce consistency forms. Pour into a bowl to prepare for dipping!
Dip each ball into the chocolate sauce (I used a toothpick or two, which was still difficult) and then sprinkle or roll in the coating :) YUMMMMM. Place back on a plate and stick in the fridge for a couple of hours!
Labels:
chocolate,
cocoa,
coconut,
dessert,
Food,
Gluten free,
happy,
Nutrition,
peanut butter,
Recipe,
vegan
Saturday, 13 April 2013
Lemon Coconut Squares
This recipe, when I first read it, sounded just perfect. Lemon, coconut, dates, oats = devine! This Rawsome Vegan Life never ceases to amaze me. Not to mention her photography... Crazy good.
My family and I may or may not have eaten a few before taking any pictures... I did change a few things in the recipe which I posted below (the modified version) and they turned out quite well! Delicious and raw :)
Lemon Coconut Squares (inspired by This Rawsome Vegan Life)
3/4 cup oats
1 cup dates
3/4 cup unsweetened shredded coconut
Lemon Filling
1/4 cup melted coconut oil (I used organic)
1/4 cup maple syrup
Juice and rind from 1 lemon (watch for seeeeeeeds!)
1/2 cup unsweetened shredded coconut
1 banana
Blend the coconut and oats in your food processor to make a rough flour before adding the dates. It should begin to stick together once the dates have been processed. Press into the bottom of a square baking pan, making sure to add a little up the edges, and put in the fridge.
Place all of the filling ingredients into your food processor and blend until a creamy texture is formed. It will seem kind of runny, but don't worry - the coconut oil will help to set it. Spread/pour evenly over the pressed crust. The recipe called to let it sit overnight in the fridge, however I would suggest using the freezer (even for half the day) for a harder square. Either way (even off a spatula), these are to die for!! Vegan, lemony, coconuty, square goodness :)
Subscribe to:
Posts (Atom)